Operation
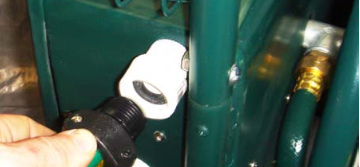
- Connect the hose to the incoming water port on the right side of the cart and connect the other end to your rain barrel or water source.
- Ensure water from the source is available. (If there is a valve on the rain barrel please open it).
- Place the Switch in the ON position (UP). (Note you should hear the pump motor running. It will change pitch during the process of sucking in water and pressurizing it.)
- The pump will run until 50 PSI is reached and then wait for the pressure to drop before cycling again.
- When finished watering with the pump place the Switch on the OFF position (DOWN) to enable the solar panel to recharge the battery.
Maintenance
If a solar water pump is used more frequently, there will always be one or more problems with the solar water pump. We can clean the solar water pump regularly to prevent solar water pump problems.
Clean the solar panel once a month or as needed.
To clean the Solar Panel:
Spray with clean water then wash with window cleaner.
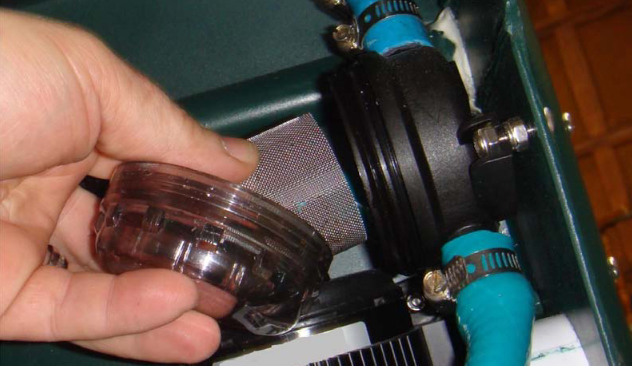
Clean the filter twice a year
To clean the filter:
1. Turn off the water supply from your rain barrel or other source.
2. Ensure the solar water pump switch in the OFF position.
3. Firmly grasp the clear filter cover and turn counter clockwise.
4. Allow the water to drain.
5. Carefully remove the mesh filter from the housing.
6. Wash the filter and clear filter cover with clean water.
7. Place the filter back in the housing.
8. Place the clear filter cover on the housing and turn clockwise to tighten it in place. (Note: Firmly hand tight is all needs.)
Clean the battery terminals once a year.
To clean the battery terminals:
1. Disconnect the solar panel from the rear of the enclosure.
2. Disconnect the wires from the battery terminals.
3. Clean the battery terminals and wire connections with a soft wire brush.
4. Reconnect the wires to the battery terminals.
5. Reconnect the solar panel to the rear of the enclosure.